Engine Rust Treatment: How to Strip, Treat and Repaint a Rusty Engine
Table of Contents
Engines rust differently from bodywork. The block and head are thick cast iron that will outlast the car, but the manifold, brackets, pulleys and fasteners around them are thin steel sitting in the hottest, wettest part of the vehicle. This guide covers how to tell the rust that spoils the look of an engine bay from the rust that stops the engine working, how to treat each, and how to repaint an engine so the finish survives the heat.
Introduction
Open the bonnet of almost any car more than fifteen years old in the UK and you will find rust on the engine. On a modern car it hides under plastic covers. On a classic it is on show, and a rusty block with a scaly manifold is usually the first thing a buyer notices. Most of it is harmless. Some of it is not, and the difference is not always obvious.
This guide sits alongside our bodywork guides on surface, scale and penetrating rust. The chemistry is the same. The materials, temperatures and products are not, so the methods differ in places that matter.
Why Engines Rust
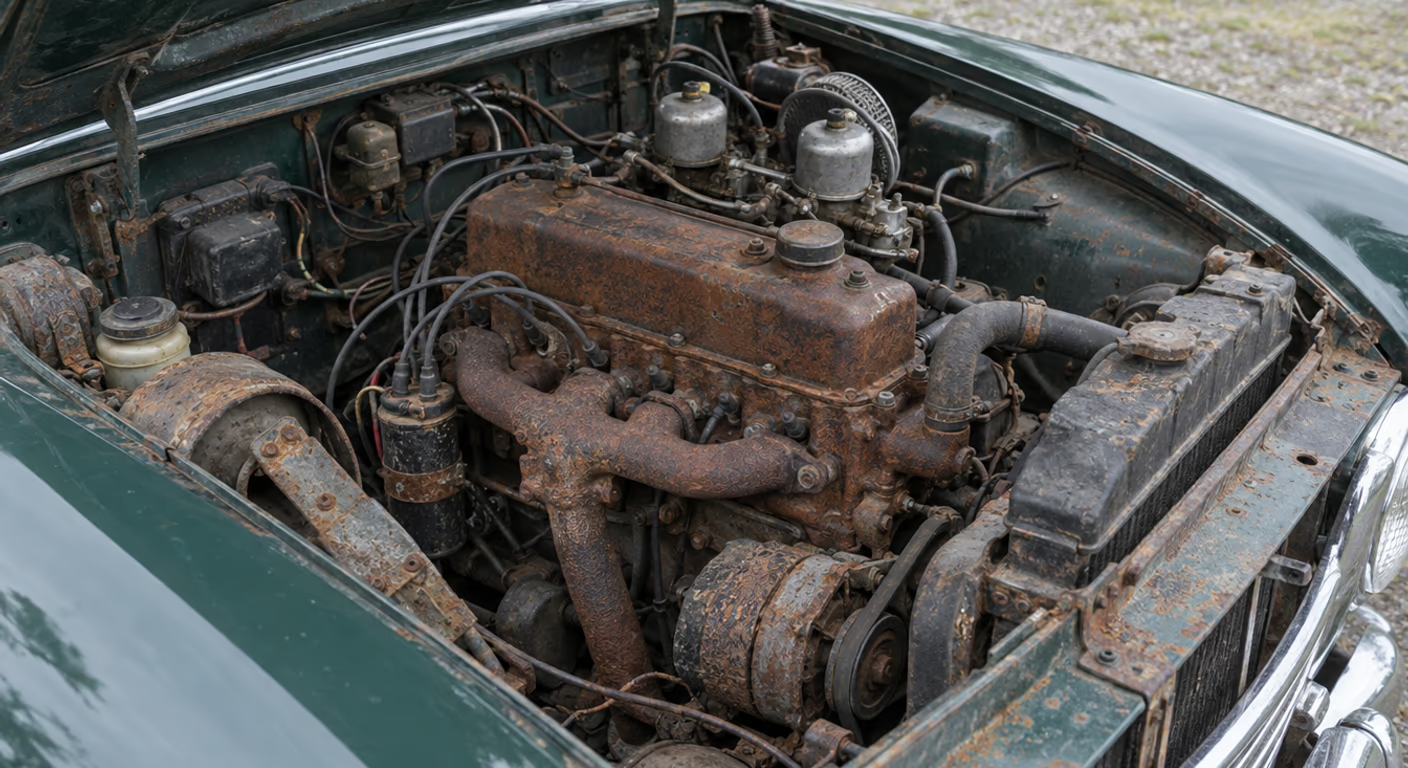
An engine bay collects everything that causes corrosion. Road spray comes up through the grille and the wheel arches. The engine itself sweats condensation every time it cools. Coolant and oil leaks hold moisture against metal. And the heat that should dry it all out also burns off whatever paint was protecting the surface.
Cast Iron Blocks and Heads
Cast iron rusts quickly on the surface and then slows down. The graphite in the iron and the rough, porous casting skin hold a stable layer of oxide that protects the metal beneath. A block that has been bare for decades will usually have lost well under a millimetre of surface. Rust on a cast iron block is almost always a cosmetic problem, with two exceptions covered below: the core plugs and the coolant passages.
Exhaust Manifolds
Cast iron manifolds run at several hundred degrees and are often bare from the factory. They form a thick, flaky scale that is normal and harmless, right up until a stud corrodes in the head or a crack opens at a flange. Pressed-steel manifolds and downpipes are thinner and do rust through, usually at a weld or where a heat shield traps moisture.
Steel Ancillaries, Brackets and Fasteners
This is where engine rust causes real trouble. Alternator brackets, pulleys, engine mount plates, timing covers, sump pans, dipstick tubes, pipe clips and the hundreds of bolts holding the engine together are plain or plated steel. They rust like bodywork, they are thin, and a seized fastener on a hot manifold is the single most common reason an engine job goes wrong.
Aluminium Alloy
Alloy heads, inlet manifolds, water pumps, thermostat housings and rocker covers do not rust, but they corrode. White, powdery oxide and pitting form where alloy meets steel in the presence of coolant or road salt. The products used on steel rust are often wrong for aluminium, which is why it gets its own section below.
Identifying Engine Rust
Clean the engine before you judge it. A pressure washer at a distance, or a degreaser and a brush followed by a rinse, will remove the oily film that hides both the extent of the rust and any leaks feeding it. Cover the distributor, alternator and air intake first.
What You Will Typically Find
- Even orange-brown bloom on the block and head: Surface rust on cast iron. Cosmetic.
- Thick grey-brown scale on the exhaust manifold: Normal heat scale. Cosmetic unless cracked.
- Flaking rust on brackets, pulleys and the sump: Scale rust on thin steel. Needs treating before it thins the part.
- Rust streaks running down from a specific point: A leak. Find it before you paint anything.
- Weeping or a rust ring around a round disc in the block side: A failing core plug. Not cosmetic.
- Rusty brown coolant, or sludge in the header tank: Internal corrosion. Not cosmetic.
- White powder and pitting on alloy castings: Aluminium corrosion, usually galvanic, around steel bolts and hose joints.
- Rust-coloured bolt heads and studs: Expect them to be seized. Plan for it.
Where It Hides
- Behind the exhaust manifold: Heat and trapped spray, and the hardest place to reach with a brush
- Under the inlet manifold: Coolant passages and a valley that holds water
- The front of the engine: Takes the full blast of spray through the grille
- Engine mounts and the bell housing flange: Where road spray meets a steel plate bolted to iron
- The sump flange and drain plug: Permanently damp and low down
- Inside the bores on a stored engine: Invisible without pulling the plugs
Cosmetic or Serious?
Before buying a single tin of paint, sort what you have found into three groups.
Leave It or Repaint It
- Surface rust on the cast iron block or head
- Heat scale on a cast iron manifold with no cracks
- Light rust on thick castings such as the timing cover or bell housing
Treat It Now
- Flaking rust on brackets, pulleys, the sump and pressed-steel covers
- Rust at the base of studs and bolts you will need to undo
- Corrosion on alloy parts around hose joints and steel fasteners
- Rusty steel coolant and fuel pipes, which fail by pinholing
Fix the Cause First
- Any core plug that is weeping, rusted or bulging
- Brown coolant, sludge, or a heater that has stopped working
- Rust streaks from a gasket, a hose joint or a cracked manifold
- Water in the oil, or oil in the water
Core Plugs
Core plugs (often called freeze plugs or Welch plugs) are the pressed steel discs set into the sides of the block and head. They rust from the inside when the coolant has lost its inhibitor, and they fail without warning, dumping the coolant on the road. A plug showing a rust ring, a weep, or a dimple pushed outward needs replacing, not painting over. On many engines the ones at the back of the block are only reachable with the engine out, so check them while you have access.
Tools and Preparation
Cleaning and Stripping
- Engine degreaser: Solvent or water-based. Paint will not stick to a surface that has ever had oil on it unless the oil is gone
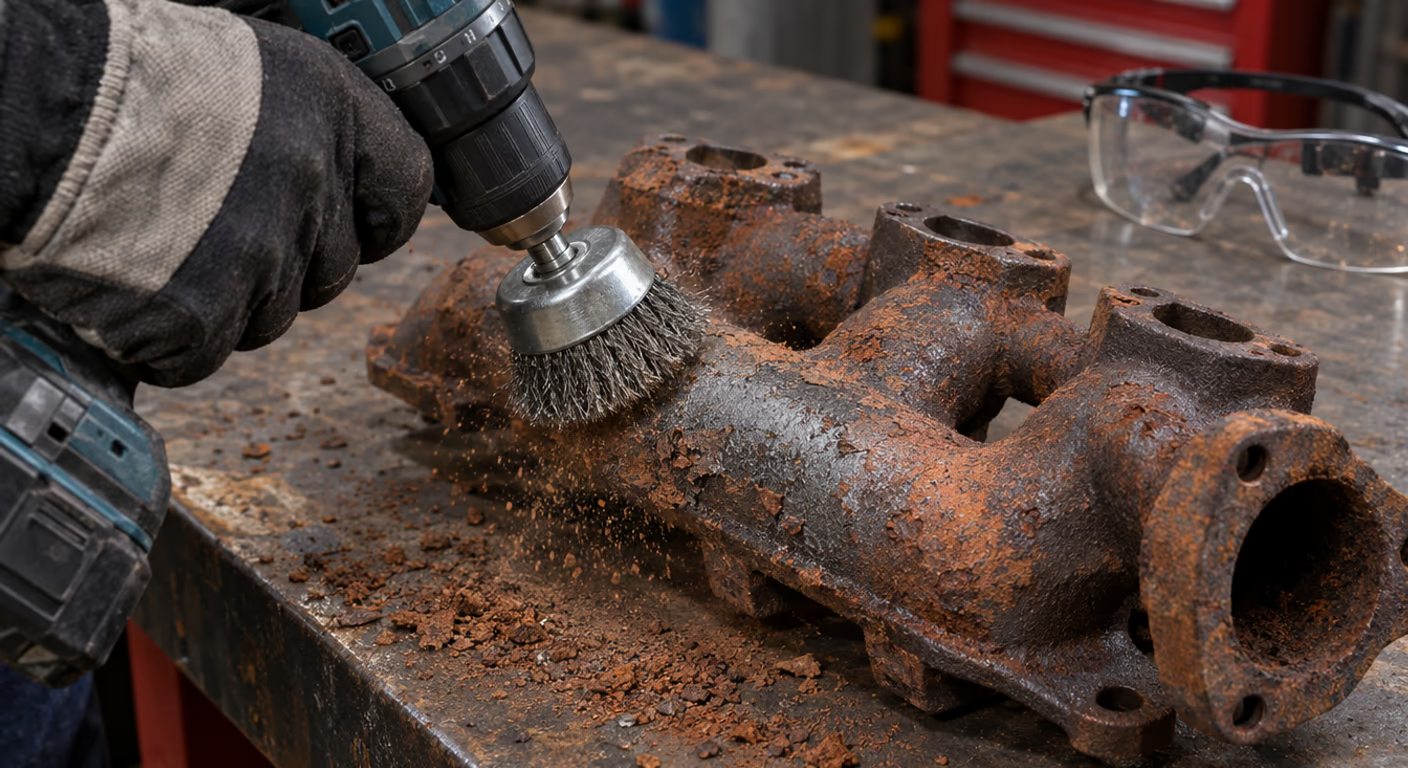
- Wire brushes: Hand brushes for corners, a cup brush on a drill or grinder for castings. Use brass brushes on alloy
- Abrasive pads and flap discs: For brackets and flat steel
- Sandblasting cabinet: The best finish for anything that unbolts. See our guide to sandblasting cabinets
- Penetrating oil: Applied to every fastener the day before, not the minute before
- Scrapers and picks: For old gasket and the scale behind the manifold
Treatment Products
- Rust converter: For steel brackets and covers where you cannot get back to bright metal. See rust converters. Not for cast iron that will be painted with engine enamel, and never on aluminium
- Rust remover: Acid or chelating removers for small parts in a bath. See rust removers
- Metal prep or etch: A phosphoric acid wash that leaves bare steel and iron ready to paint
- Engine enamel: Heat-resistant paint for the block, head and covers. Rated to 150°C or so for most one-pack enamels, higher for some
- Very high temperature coating: For manifolds, downpipes and heat shields. Rated to 600°C and beyond, and only hardens once it has been through a heat cycle
- Corrosion inhibitor spray: ACF-50 or similar for the finished bay. See rust inhibitors
Safety
- Eye protection and gloves for wire brushing. A cup brush sheds wires at speed
- A particulate mask for dry stripping; rust and old paint dust are not for breathing
- A proper filter mask for spraying one-pack enamel, and nothing less than air-fed breathing apparatus for two-pack paint. Two-pack engine paints contain isocyanates, and the HSE guidance for motor vehicle repair explains why a cartridge mask is not enough
- Disconnect the battery before working around the alternator and starter
- Let the engine cool completely. A manifold holds heat for hours
In the Car or Engine Out?
Most engine rust is treated with the engine in the car. The results are good on the parts you can reach and poor on the parts you cannot, which is why in-situ repaints so often look fine from above and rough from below.
Treat It in the Car When
- The rust is cosmetic and you want a tidy bay rather than a concours one
- The ancillaries can be unbolted and treated on the bench
- The engine is otherwise healthy and not due a rebuild
Take It Out When
- The rear core plugs need replacing
- The manifold studs are seized and need drilling out
- The engine is coming apart anyway
- You want the finish to last and match on every face
A sensible middle course is to remove everything that unbolts easily, treat and paint those parts properly on the bench, and clean and paint the block in place. The bench parts come up well, and they are the ones that were rusting worst.
Treating Each Part of the Engine
The Block and Head (Cast Iron)
Degrease, then wire brush to remove loose rust and flaking paint. You are not trying to reach bright metal across the whole casting; a sound, tight layer of dark oxide on cast iron is an acceptable base for engine enamel. Wash with metal prep, rinse, and dry with heat or compressed air. Paint within the hour, because fresh iron flash-rusts in damp air.
Skip the rust converter here. Converters leave a surface that engine enamel does not always bond to well, and the heat cycling of a block will find any weak bond. Converters belong on the steel brackets.
The Exhaust Manifold
Remove it if the studs will come. Strip the scale with a cup brush or, better, in a blast cabinet. Degrease it even if it looks clean; manifolds are soaked in oil mist. Apply a very high temperature coating in thin coats, then cure it. Most VHT coatings stay soft until the first heat cycle, and the maker's instructions for that first run are the difference between a finish that hardens and one that peels in a sheet.
If the studs will not come, treat it in place with a hand brush and an aerosol, and accept a lesser result. Do not force a seized manifold stud. A snapped stud in a cast iron head turns an afternoon's cosmetic job into a head-off repair.
Brackets, Pulleys, Covers and the Sump
These are plain steel and are treated as you would a body panel. Unbolt them, strip them to bright metal where you can, use a rust remover bath or converter where you cannot, prime, and paint. Thin steel parts with pitting should be checked for thickness; a rotted alternator bracket is a safety issue, not a cosmetic one. Replacement pressings for most classics are cheap.
Fasteners
Soak everything in penetrating oil the day before. Use six-point sockets, not twelve-point, on rusty heads. Heat helps on manifold nuts. Anything that comes out rusty goes in the rust remover bath, then gets either replaced with new plated fasteners or painted with the part. Use copper or nickel anti-seize on every stud and bolt going back into the manifold or the head.
Aluminium Parts
Clean alloy with degreaser and a brass brush or a non-woven pad, never a steel wire brush, which leaves embedded particles that start galvanic corrosion of their own. Do not use steel rust converters or phosphoric metal prep on aluminium. Pitting around hose joints is cleaned out, and if a water pump or thermostat housing is pitted through its sealing face it is replaced. If you paint alloy, use an etch primer made for it first.
Internal Corrosion
The rust you cannot see is the rust that costs money.
Coolant Passages
Antifreeze is also the corrosion inhibitor for the inside of the engine. Once it is old, or has been topped up with plain water for years, the iron block, the alloy head and the brass or alloy radiator form a battery and eat each other. The signs are brown coolant, sludge in the header tank, a heater that blows cool, and core plugs weeping from the inside.
The fix is a thorough flush, a chemical cooling system cleaner if the sludge is heavy, and a fresh fill with the correct type of antifreeze at the correct strength. Change it on schedule from then on. Rust converter and sealants do not belong inside a cooling system.
Bores and Valves on a Stored Engine
An engine left standing with the plugs in and the valves open admits damp air to the bores. The cylinder walls above the piston rings rust, and when the engine is next turned over the rings scrape the rust off and score the bore. Before storing an engine for more than a couple of months, run it to temperature, remove the plugs, spray fogging oil into each bore, turn the engine over a few times by hand and refit the plugs. Our storage guide covers the rest of the car.
An engine that has already stood for years should not be started on the key. Pull the plugs, oil the bores, and turn it by hand on the crank bolt first. If it will not turn, stop.
Step-by-Step: Strip, Treat and Repaint an Engine
1. Record and Remove
- Photograph the engine bay from every side before touching anything, including hose and cable routes
- Disconnect the battery
- Remove the air filter, plug leads, alternator, brackets, pulleys and anything else that unbolts easily. Bag and label the fasteners by part
- Remove the exhaust manifold if the studs cooperate
2. Degrease
- Cover the distributor, carburettor or throttle body, and any open intake
- Apply degreaser to a cold engine, let it work, agitate with a brush, and rinse
- Repeat until a clean rag wiped on the block comes away clean
- Dry thoroughly with compressed air or a heat gun
3. Strip and Treat
- Wire brush the block and head to remove loose rust and flaking paint
- Strip the bench parts to bright metal, or treat with a rust remover bath
- Apply rust converter to steel parts that cannot be fully stripped. Not the block, not the alloy
- Wash iron and steel with metal prep, rinse, and dry
4. Mask
- Mask every machined face: the head gasket surfaces if the head is off, the manifold faces, the sump flange, the bell housing face
- Mask threads, studs, sensors, the dipstick tube opening, and the filler neck
- Mask the engine number. Overpainting it is a nuisance at best and a provenance problem at worst
5. Prime and Paint
- Prime bright steel parts. Cast iron with a sound oxide base can take engine enamel direct, but check the paint maker's instructions
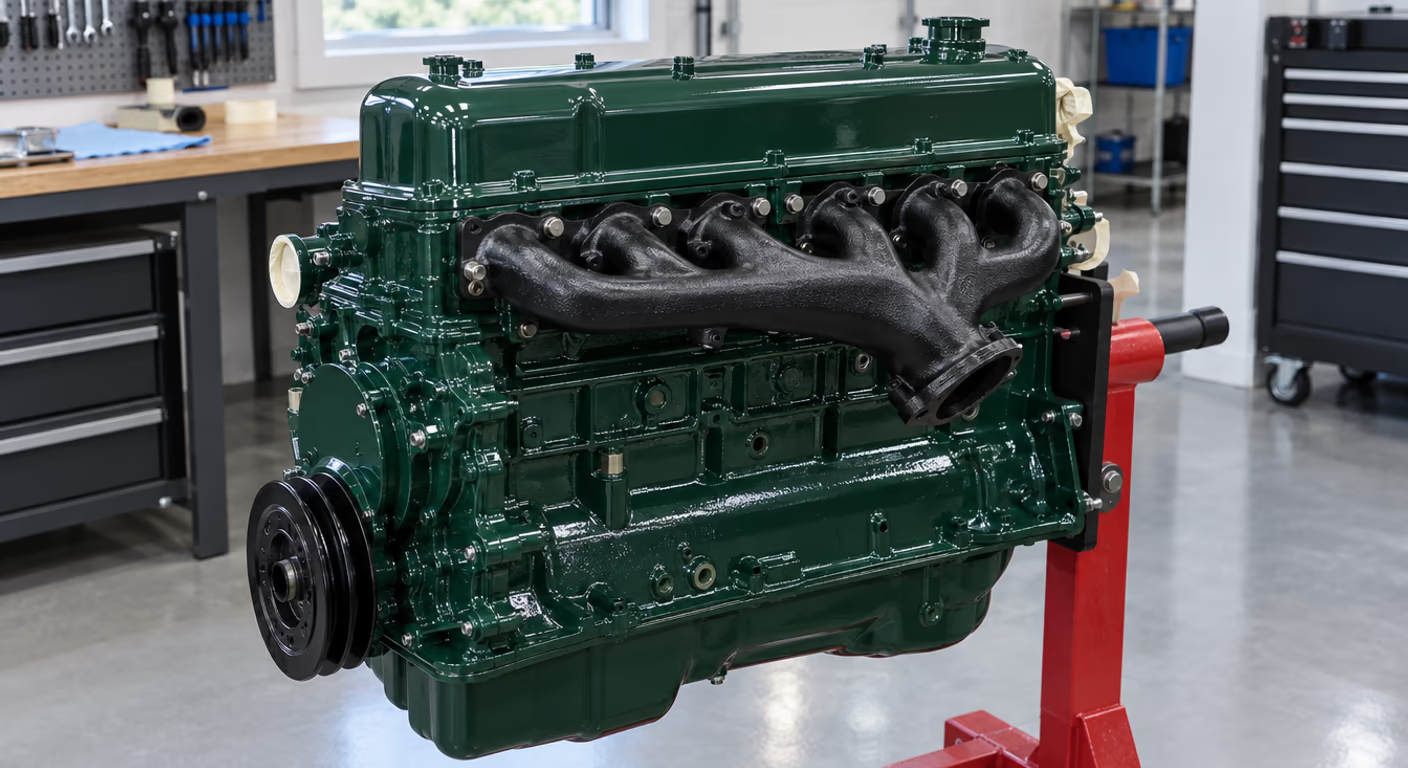
- Apply engine enamel in several thin coats within the recoat window on the tin. A thick coat on a casting will sag into the corners and never cure
- Paint the manifold and heat shields with a very high temperature coating, not engine enamel
- Allow the full air-dry time before reassembly. Most enamels want days, not hours, before they are handled
Choosing the Paint and the Colour
Engine enamel, very high temperature coatings and two-pack paints are different products with different heat ratings, and the manufacturers' instructions often contradict each other on preparation and curing. Our sister site enginepaints.com covers this in depth. The UK engine paint shop lists several hundred enamels, aerosols and high-temperature paints sorted by heat rating, colour and brand, and the guides cover preparing an engine for paint, applying enamel, painting manifolds and exhausts, and the spray equipment and masks to use. If you own a British classic, it also has the factory engine colour your engine left the works in.
6. Cure and Reassemble
- Refit the bench parts with new or cleaned fasteners and anti-seize on everything into cast iron
- Fit the manifold with a new gasket and torque the nuts in sequence
- Reconnect the battery and check for leaks before the first start
- Follow the paint maker's heat-cure instructions for the first run. For most VHT coatings this means a staged warm-up with cooling in between, and the smell is normal
Keeping It Rust-Free
- Fix leaks: Oil holds dirt and moisture against the metal and defeats any paint
- Change the coolant on schedule: It is the only thing protecting the inside of the block
- Use the car: An engine that reaches full temperature regularly dries itself out. Short trips and long lay-ups do the damage
- Inhibitor spray: A light coat of ACF-50 or similar over the finished bay, renewed yearly, keeps the bare steel and the fasteners from blooming
- Keep the drains clear: The scuttle and bulkhead drains that dump water onto the back of the engine
- Store it properly: Dry, ventilated, bores oiled, and ideally started and run to temperature every few weeks. See our storage tips
Conclusion
Rust on an engine looks worse than it is on the castings and is worse than it looks on the steel around them. Sort the two before you start, fix anything that is leaking or failing, and treat the brackets, covers and fasteners as seriously as you would a sill. The block itself only needs cleaning and painting properly.
The paint is where engine jobs most often fail. Degrease more than seems necessary, use the right product for the temperature of each part, keep the coats thin, and respect the cure. Done that way, a repaint lasts as long as the car.
For the bodywork around the engine bay, see our guides to surface rust and scale rust. For the products mentioned here, our product comparisons cover converters, removers and inhibitors in detail.
References and Further Reading
- Health and Safety Executive, "2-pack isocyanate paints", Motor Vehicle Repair guidance, hse.gov.uk/mvr/bodyshop
- Driver and Vehicle Standards Agency, "MOT Inspection Manual: Cars and Passenger Vehicles", current edition
- enginepaints.com, "Preparing an Engine for Paint" and "Painting Manifolds and Exhausts", 2026
- enginepaints.com, "Engine Paint Shop: UK", paints sorted by heat rating, 2026