Surface Rust Treatment: Complete Guide to Early Stage Rust Repair
Table of Contents
Surface rust represents the earliest stage of corrosion and is the easiest to treat effectively. This comprehensive guide provides UK vehicle owners with practical techniques to address surface rust before it progresses to more serious damage.
Introduction to Surface Rust
Surface rust is the initial stage of corrosion, where iron in the metal reacts with oxygen and moisture to form iron oxide on the surface layer. At this early stage, the structural integrity of the metal remains intact, making it the ideal time for intervention.
In the UK's damp climate, surface rust can develop quickly - often appearing within weeks of paint damage exposing bare metal to the elements. Prompt treatment not only preserves your vehicle's appearance but prevents the progression to more serious and costly forms of rust damage.
Identifying Surface Rust
Before beginning treatment, it's important to confirm you're dealing with surface rust rather than more advanced stages of corrosion:
Characteristics of Surface Rust
- Appearance: Red-brown discoloration on metal surfaces
- Texture: Slightly rough, flaky surface but no significant pitting
- Depth: Limited to the outermost layer of metal with no visible holes
- Structural integrity: Metal remains solid with no weakness when pressed firmly
- Location: Commonly appears at paint chips, scratches, panel edges, and seams
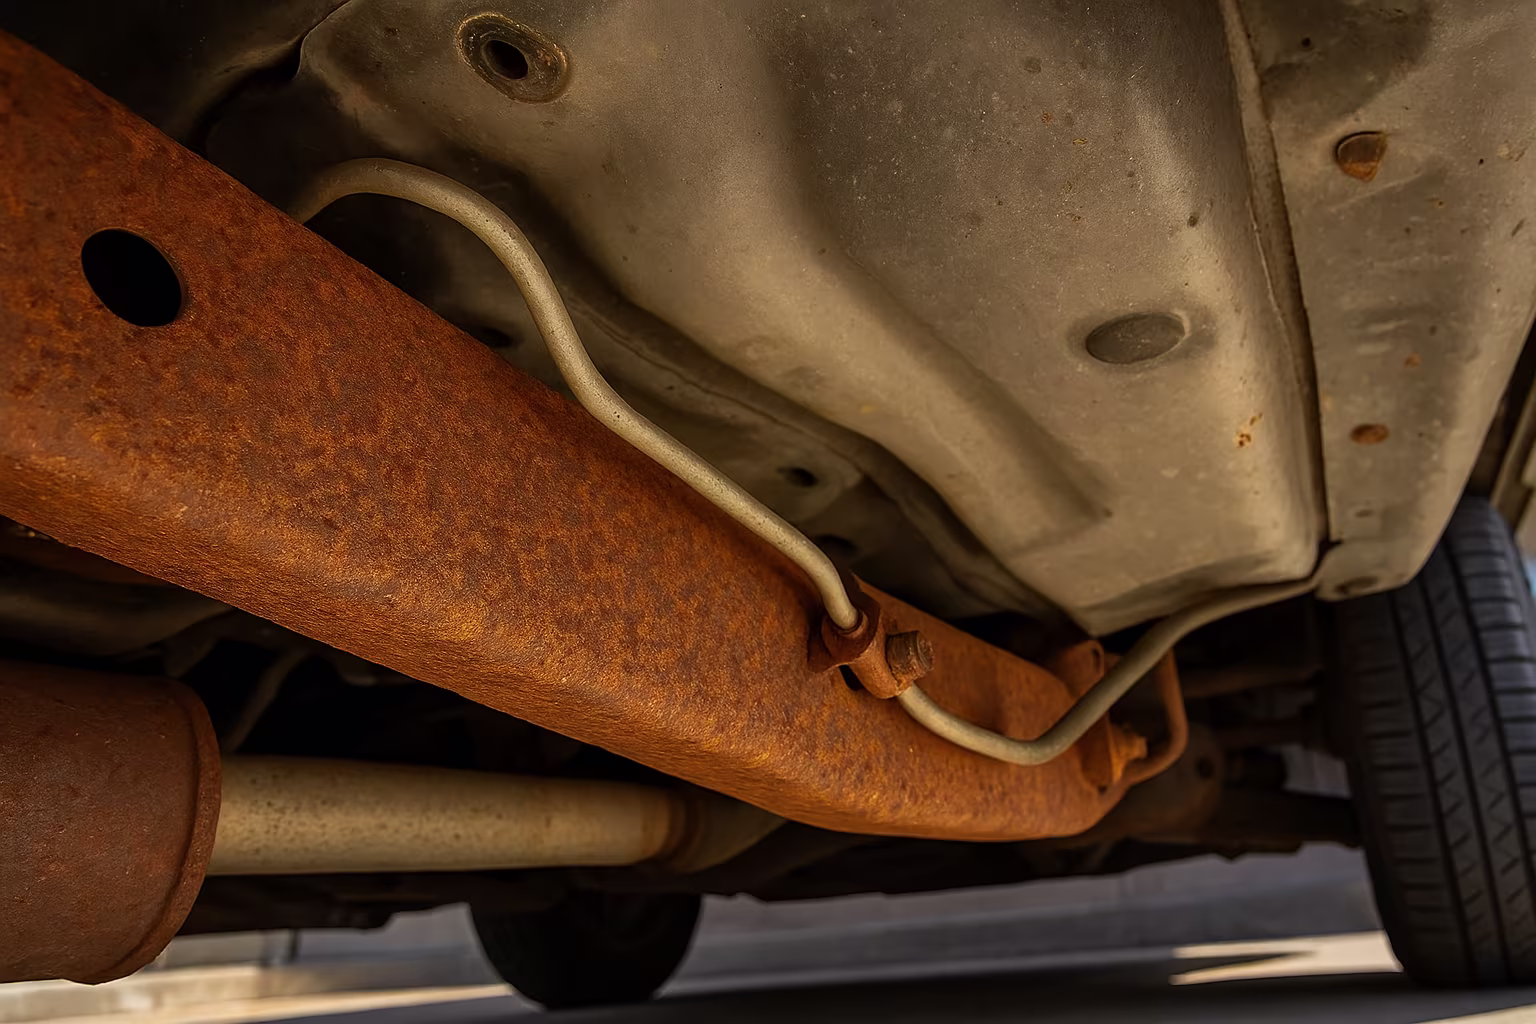
Common Surface Rust Locations on UK Vehicles
- Lower door edges: Where water collects and paint often chips
- Wheel arches: Exposed to road spray, salt, and stone chips
- Bonnet/hood and boot/trunk edges: Where paint is thin and chips easily
- Exposed bolt heads and fasteners: Often lose their protective coating first
- Surface scratches: Where the protective paint layer has been compromised
- Boot/trunk floor: Where water may pool from leaks or spills
When to Seek Professional Help
If you're uncertain whether you're dealing with surface rust or a more advanced stage, consult a professional. Surface rust should show no metal deformation, bubbling paint, or structural weakness. If you observe these signs, you may be dealing with scale or penetrating rust, which requires different treatment approaches.
Preparation and Safety
Proper preparation and safety precautions are essential before beginning surface rust treatment:
Safety Equipment
- Respiratory protection: Dust mask for sanding, proper respirator for chemical products
- Eye protection: Safety glasses or goggles
- Skin protection: Chemical-resistant gloves, long sleeves
- Proper ventilation: Work in well-ventilated areas, especially with chemical products
Tools and Materials
- Cleaning supplies: Car wash soap, degreaser, isopropyl alcohol
- Abrasives: Sandpaper (80, 120, 220, 400 grits), sanding blocks, wire brushes
- Power tools (optional): Electric drill with wire wheel attachment or angle grinder
- Masking materials: Masking tape, plastic sheeting, newspaper
- Rust treatment products: Rust converter, primer, paint, clear coat
- Application tools: Brushes, spray equipment, microfiber cloths
Workspace Preparation
- Choose a dry, covered area like a garage or carport
- Ensure good lighting to properly see the affected areas
- Work in moderate temperatures (10-25°C) for optimal product application
- Protect surrounding areas from dust and overspray
- Have a clean water source available for cleaning and emergencies
Surface Rust Removal Methods
There are several effective methods for removing surface rust:
Mechanical Removal
Physical removal of rust using abrasives:
- Hand sanding: Using sandpaper with progressively finer grits (80-400)
- Wire brushing: Manual or power drill attachments for texture and hard-to-reach areas
- Abrasive wheels: Angle grinder with appropriate attachments for larger areas
- Sanding blocks: For even pressure across flat surfaces
Best for: Accessible areas, moderate surface rust, when control over the process is important.
Chemical Removal
Using chemicals to dissolve or convert rust:
- Phosphoric acid products: Dissolve rust while preparing the surface for paint
- Oxalic acid: Gentler option that effectively removes rust
- Citric acid: Natural option that works slower but is less hazardous
- Commercial rust removers: Purpose-formulated products with varying aggressiveness
Best for: Intricate areas, when mechanical methods risk damaging the metal, or for thorough removal.
Electrolytic Removal
Using electricity to separate rust from metal:
- Involves submerging the part in an electrolyte solution
- Requires power supply, sacrificial anode, and suitable container
- Works by reversing the oxidation process
- Highly effective but suitable only for removable components
Best for: Small removable parts like fasteners, brackets, or trim pieces.
| Removal Method | Effectiveness | Difficulty | Required Tools | Best For | UK Cost |
|---|---|---|---|---|---|
| Hand Sanding | Good | Low | Sandpaper, blocks | Small areas, detail work | £5-10 |
| Power Tools | Very Good | Medium | Drill, grinder, attachments | Larger areas, stubborn rust | £30-100 |
| Chemical Removers | Excellent | Low | Brushes, containers | Intricate areas, thorough removal | £10-20 |
| Electrolytic | Excellent | High | Power supply, electrolyte | Removable parts only | £20-50 |
Surface Rust Treatment Options
After removing rust, several treatment approaches can prevent recurrence:
Rust Converters
Products that chemically transform remaining rust into a stable compound:
- Tannic acid-based: Converts iron oxide to iron tannate (black finish)
- Phosphoric acid-based: Creates iron phosphate coating that resists further corrosion
- Advantages: Can treat difficult areas, works on residual rust
- Popular UK products: Kurust, Jenolite Rust Converter, Bilt Hamber Hydrate 80
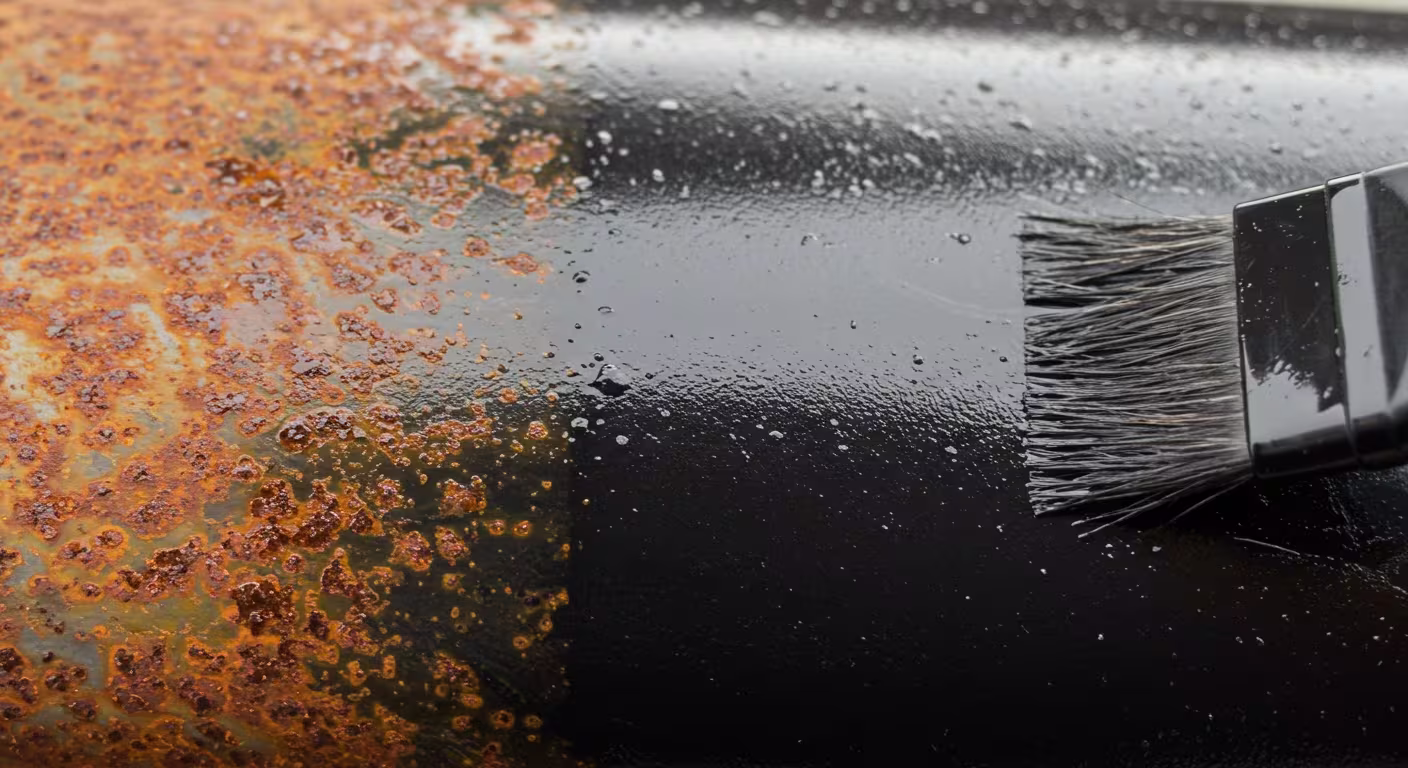
Direct-to-Rust Paints
Specialty paints designed to adhere to properly prepared rusty surfaces:
- All-in-one formulations: Combine primer, converter, and topcoat properties
- Advantages: Simplified application, fewer steps, good durability
- Limitations: Limited color options, thicker application
- Popular UK products: Hammerite Direct to Rust, Rustoleum CombiColor, Jenolite Direct to Rust
Traditional Paint Systems
Complete multi-step systems for optimal finish:
- Zinc/metal primer: First layer providing corrosion protection
- High-build primer: Fills minor imperfections
- Color-matched paint: Factory-matched or custom mixed
- Clear coat: Protective top layer providing UV protection and gloss
- Advantages: Professional finish, color matching capability, maximum durability
Step-by-Step Surface Rust Treatment Guide
Follow these steps for effective surface rust treatment:
1. Preparation
- Thoroughly clean the affected area with car wash soap
- Remove any wax, grease, or oil with panel prep or isopropyl alcohol
- Allow the surface to dry completely
- Mask surrounding areas to protect from dust and overspray
2. Rust Removal
- Begin with coarse sandpaper (80-120 grit) to remove loose rust
- Switch to finer sandpaper (220 grit) to smooth the surface
- For hard-to-reach areas, use wire brushes or chemical rust removers
- Continue until all visible rust is removed and bare metal is exposed
- Clean the area again with panel prep to remove all dust and residue
3. Rust Conversion (Optional but Recommended)
- Apply rust converter to any areas where minute rust remains
- Follow product instructions for application method and drying time
- Look for color change (typically to black) indicating successful conversion
- Allow to fully cure according to manufacturer specifications
4. Priming
- Apply zinc-rich or self-etching primer to the bare metal
- Ensure complete coverage of the affected area
- Extend primer slightly beyond the repair area for proper blending
- Apply in thin, even coats rather than one thick coat
- Allow proper drying time between coats (refer to product instructions)
5. Color Coat Application
- If using aerosol paint, warm the can to room temperature for best results
- Apply color coat in thin, even layers
- Hold spray can 20-25cm from surface for optimal application
- Allow appropriate flash time between coats (typically 15-20 minutes)
- Build up to the desired coverage (usually 2-3 coats)
6. Clear Coat Application (For Two-Stage Systems)
- Once color coat has dried to manufacturer specifications, apply clear coat
- Use the same technique as with color coat - thin, even layers
- Apply 2-3 coats for adequate protection
- Allow final coat to dry completely before exposing to elements
7. Final Steps
- For perfect blending, consider wet sanding with very fine grit (1500-2000) and polishing
- Remove all masking materials carefully
- After full cure (usually 24-48 hours), apply wax or sealant for additional protection
- Inspect repair regularly for any signs of recurrence
Important Tips for UK Weather
The UK's damp climate presents challenges for rust repair. Avoid working in high humidity (above 70%) or temperatures below 10°C. If working outside, check the weather forecast to ensure at least 24 hours of dry conditions following treatment. Consider using a dehumidifier in your workspace if possible.
Preventing Surface Rust Recurrence
After treating surface rust, take these steps to prevent it from returning:
Regular Maintenance
- Frequent washing: Especially after exposure to road salt or coastal areas
- Prompt touch-ups: Address new chips or scratches quickly with touch-up paint
- Waxing: Apply quality car wax every 3-4 months
- Paint sealants: Consider longer-lasting synthetic sealants or ceramic coatings
- Regular inspections: Check vulnerable areas monthly, especially during winter
Preventative Products
- Cavity wax: For internal body sections like door bottoms and sills
- Underbody coating: For protecting the vehicle's underside
- Clear protective film: For high-impact areas prone to stone chips
- Dielectric grease: For electrical connections and fasteners
- ACF-50: Anti-corrosion formula for exposed metal components
Storage and Environmental Considerations
- Garage storage when possible, especially during winter months
- Use of car covers for outdoor storage (ensure they are breathable)
- Consider dehumidifiers in garage spaces
- Extra protective measures if living in coastal areas or high salt-use regions
For more comprehensive prevention strategies, visit our Rust Prevention Guide.
Conclusion
Surface rust treatment is one of the most straightforward and cost-effective repairs you can perform on your vehicle. By addressing rust in its earliest stage, you prevent more serious damage and maintain your vehicle's appearance and value.
The key to successful surface rust treatment is thoroughness - proper preparation, complete rust removal, and appropriate protective measures will ensure lasting results. In the UK's challenging climate, being proactive about surface rust can save significant money and effort compared to dealing with advanced corrosion.
Remember that surface rust is a warning sign that your vehicle's protective systems have been compromised. After treating the immediate issue, consider whether additional preventative measures might be needed for other vulnerable areas of your vehicle.
For more advanced rust problems, refer to our guides on scale rust and penetrating rust treatment.
References and Further Reading
- Society of Automotive Engineers, "Surface Preparation Techniques for Automotive Refinishing", Technical Paper 2023-01-0529
- British Coatings Federation, "Vehicle Refinishing Best Practices", 2024 Edition
- Institute of Corrosion, "Early Stage Corrosion Treatment in Transport Applications", Research Paper 2025-03
- Automotive Refinishing Institute, "Rust Conversion Chemistry and Application", Technical Bulletin 127, 2024
- Health and Safety Executive, "Safe Use of Chemical Rust Treatments", HSE Guidance Note GS42, 2023